Surfskating and surfing
The perfect addition?
You’re sitting at home on the sofa and wondering how you can practice surfing without the sea! Grab a surfskate and turn the parking lot, the freshly paved road or the skate park into your wave! This small surfboard on wheels is the perfect dry alternative to the conventional surfboard in the waves thanks to its special axles and maneuverability. Movement sequences, balance, posture and rotations can be practiced, learned and perfected with the Surfskate from beginner to advanced level. So get out of bed, get on your board and start your next surfing experience on the beach super prepared.
Below you will find a short guide with tips and pictures on the most important movements, regardless of whether you are a beginner or advanced. If you are not familiar with certain technical terms, just take a look at the glossary at the end of the article.
WHICH SURFSKATE IS RIGHT FOR ME?
There are now many manufacturers and axle systems on the market. The main difference between a surf skate and a normal skateboard or cruiser is the front axle. The special design allows you to make much tighter turns and even build up speed without putting your foot down. The movements are very similar to surfing, which is why surf skates are used by many as training equipment but also as a sport in their own right. In the next step, we take a look at the three best-known surfskate axle systems in comparison:


CARVER CX:
- simple, robust, inexpensive axle
- Rather stable riding behavior (therefore good for beginners, but also advanced riders who want to ride bowl and fakie)
CARVER C7:
- Versatile and adjustable
- Tight bends and maneuvers possible
YOW:
- Very tight bends and maneuvers possible
- Very suitable for speed generation due to pretensioning
- Very responsive, therefore less suitable for beginners
SURFSKATE BEGINNER LEVEL
PUSHING ON THE SURFSKATE
The first step is to practise pushing and braking to get up to speed on the flat with the surf skate and to be able to get off again in a controlled manner. Place your front foot on or just behind the front axle. If possible, do this at a slight angle so that you don’t have to turn your foot too far for a firm stance. Use your back foot to accelerate by pushing forward. For “Regular” this is the right foot on the right side of the board and for “Goofy” the left foot on the left side. Make sure that your center of gravity is as low as possible (bend your front knee) and centered over your front knee and the middle of the board. If you feel unsure here, team up with a partner and hold each other by the hands or shoulders
. After you have pushed once or twice with your back foot, you can place it between the back axle
and the tail in the arch and at the same time bend the front foot further.

THE BASIC ATTITUDE
For a controlled ride, make sure that your front/rear foot weight distribution is approximately 50/50 and that you are standing centrally over the board with your knees bent. As with surfing, “where you look is where you go”,
so look a few meters ahead of you to where you want to go. The basic position is very similar to the position on the surfboard. The back knee is slightly turned inwards and our hips and, above all, our shoulders are facing forwards. Your upper body is upright, your knees are loose and you have your left arm over the left side and your right arm over the right side of the board.

BRAKING WITH THE SURFSKATE
To slow down, take your back foot off the tail and let it drag across the ground next to your board in a controlled manner. Again, the more you can bend your front leg, the more controlled it becomes.
CURVES AND TURNS IN THE FLAT
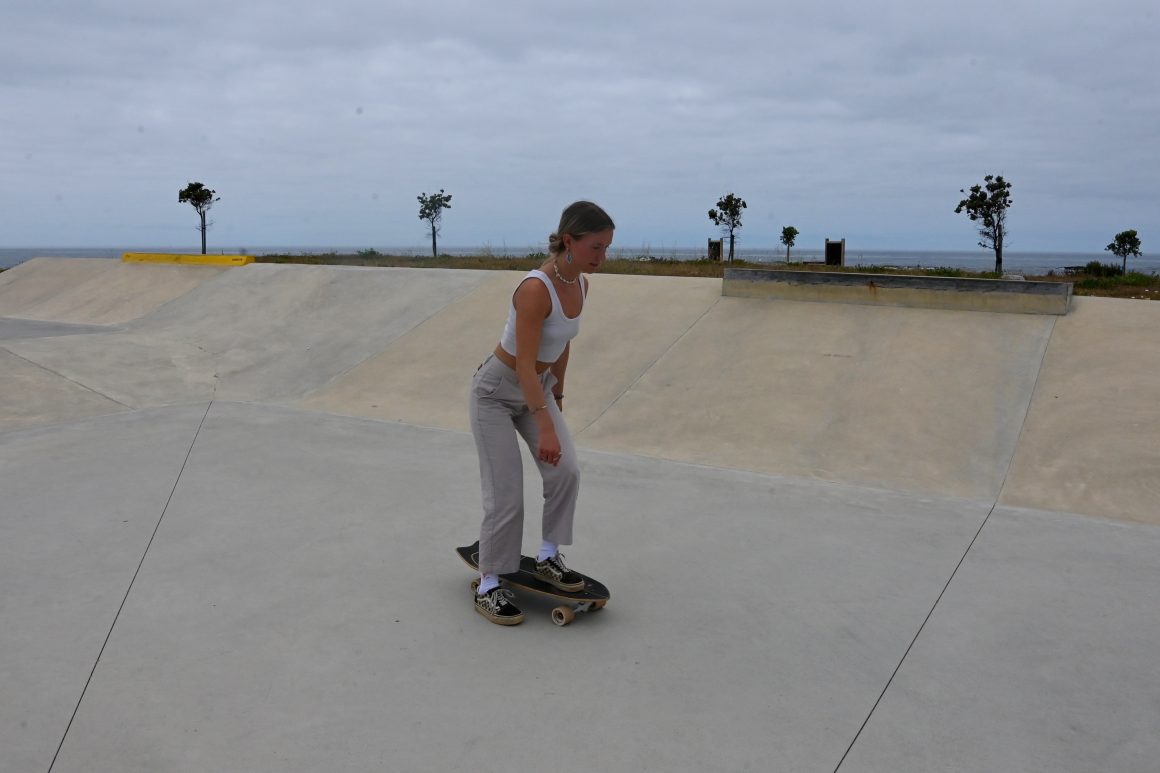
Have you already got the feel for pushing and controlled braking? Then the next step is to initiate your first turns. Try to get into the habit of using not only your feet (toe or heel pressure), but also your entire body, especially your upper body and your gaze. In addition to your gaze, you can also use your front arm to show where you want to go next. Consciously use your upper body to initiate long and smooth turns through rotation. Make sure that your weight is still evenly distributed on the front and back foot and that
your knees are relaxed. The most common mistake when feeling insecure is to lean backwards and straighten up too much.


SPEEDGENERATION IN FLAT
With the right technique, you can build up speed on the surfskate even without the “pushing” described above. Start with the so-called speed generation on the flat and later transfer it to a ramp to get even closer to the feeling in the wave. In order to build up speed effectively, you need to combine the cornering technique you have previously learned with a high –
low release. For the sake of simplicity, you start with the speed generation on the frontside. This means a right wave (right turn) for Regular and a left wave (left turn) for Goofy. For this exercise, place four cones on the ground in a square about 3 meters apart. Ride towards the first cone at a certain basic speed (Regular from the left in a clockwise direction and Goofy from the right in an anti-clockwise direction). The movement sequence can be divided into two pictures: In the first, you approach the cone by bringing your back arm (Regular on the right, Goofy on the left) forward, pointing at the cone and getting low to our knees. In the second image,
after you have reached the cone, the arm snaps back up and you push yourself powerfully upwards/forwards from the legs. The result is a slight 45°-90° turn and a build-up of speed due to the shift in your center of gravity out of the turn. You can now repeat this in a circle around the square at each cone.


Once you have mastered the speed generation on the frontside, you can practise your backside in the next step. This means a left turn for Regular and a right turn for Goofy. Ride at basic speed again, this time in the opposite direction (Regular from the right counter-clockwise and Goofy from the left clockwise) towards the first cone. Pay attention to your front arm (Regular left, Goofy right) to point at the cone in the first picture and bend your knees. As you pass the cone with tension in your legs, push off and turn your upper body in the direction you want to go. Again, you can repeat the exercise in a circle at each cone.


SURFSKATE LEVEL ADVANCED
SPEEDGENERATION IN THE RAMP
As soon as you have mastered the speed generation and cornering technique on the flat, you can transfer this to a ramp in the next step. This will bring you even closer to the feeling of surfing a wave on your frontside or backside. The technique for speed generation remains the same as in the flat, with the difference that you can now build up even more speed through gravity. As soon as you have successfully pumped yourself up the ramp (or wave), you shift your body weight back down to
and over your front foot on the way down (see the third picture in each case) in order to ride into your next maneuver with as much speed as possible. In the following pictures you can see the frontside (the wave is in front of our chest) and backside (the wave is in our back) speed generation in a relatively flat ramp. Again, cones can be used to mark both the wave trough and the wave shoulder. Again, the frontside is easier. Make sure that your back arm follows the high-low release and that your gaze is where you want to go next.


On the backside, you should reach a certain shoulder opening with your front arm towards the upper cone. During all movements, continue to pay attention to your gaze and look where you want to go next.


BOTTOM TURN AND TOP TURN COMBINATION (FRONTSIDE)
The bottom turn is probably the most important foundation for all maneuvers on a wave. You can practise this somewhat more complex sequence of movements very well on a surf skate, both on the flat and in a ramp. Once you have mastered the bottom turn, you can transfer the movement directly to the top turn with very slight changes. Here too, you can use cones to mark both the wave trough and the shoulder / pocket.
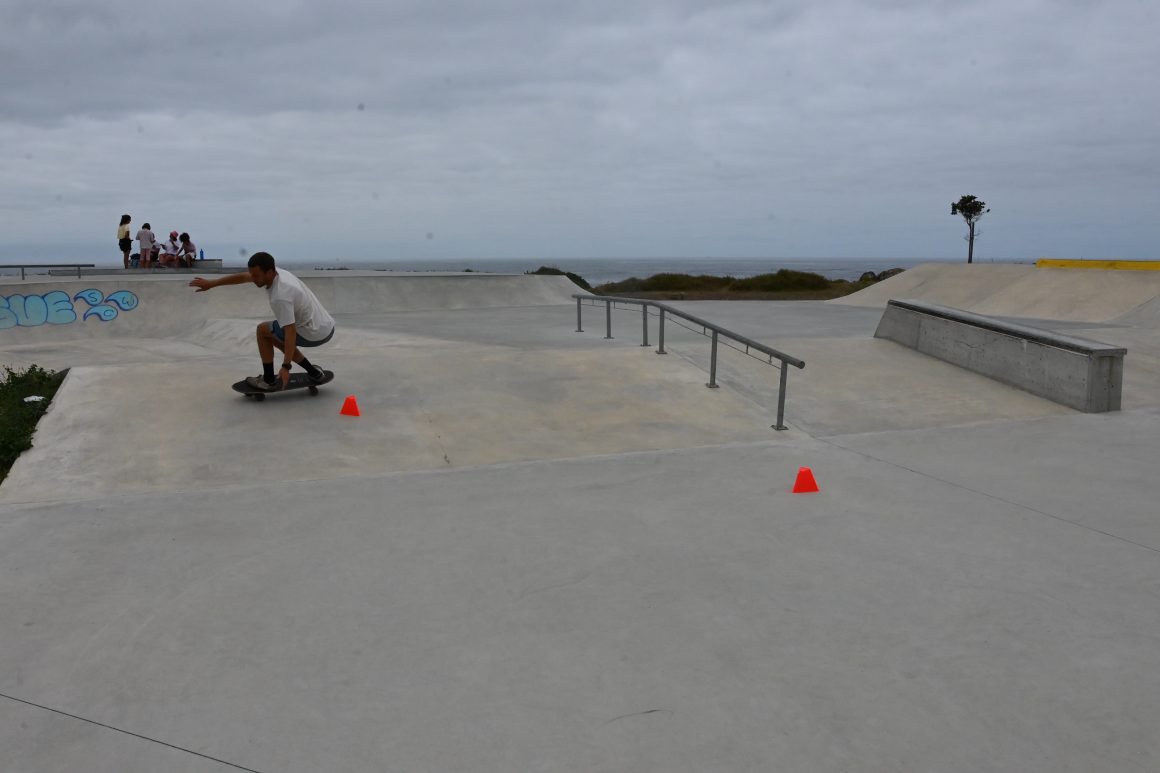
For the sake of simplicity, we start again on the frontside, i.e. with a frontside bottom turn. The following series of pictures shows the maneuver directly in a slight ramp. Of course, we can also practise the movement on the flat at the beginning, the steps are the same.
- RIDE INTO THE WAVE VALLEY: The gaze and the back arm point towards the lower cone (our pivot point in the wave valley). On the way “down”, bend your knees and build up pressure.


- THE BOTTOM TURN: Your back arm serves as a pivot point and is placed in the “water” (in the place of the cone). From now on, your gaze is directed towards the top cone. This combination results in another upper body rotation and therefore a tight turn. There are three key words in the bottom turn: “Compress” (bend your knees), “Reach” (reach into the water with your back arm leaning forward) and “Hold” (you have to hold this position for a moment in order to ride the wave up again at as steep an angle as possible). If the “hold” position is shortened here, you will only be able to ride the wave at a relatively flat angle (similar to the speed generation).


- RIDE UP: To ride up the wave again at speed from the bottom turn, push yourself upwards forcefully from your legs. You reinforce the upper body rotation initiated earlier in the bottom turn by pushing your back arm (which was previously our pivot point) backwards and upwards. This results in the upper body turning in the opposite direction to the top turn.


- THE TOP TURN: In surfing and surf skating, upper body rotation plays a central role in making turns as good and wide as possible. You enter the top turn from the previous step with an opposite upper body rotation. This gives you much more rotation and therefore energy to initiate a top turn (here a left turn, for Goofy a right turn). Look back into the wave trough, let your front and back arm dictate the rotation and bring your body’s center of gravity further down again.

BOTTOM TURN AND TOP TURN COMBINATION (BACKSIDE)
- RIDE INTO THE WAVE VALLEY: Your gaze and front arm point towards the lower cone (your pivot point in the wave valley). On the way “down”, bend your knees and build up pressure.


- THE BOTTOM TURN: Your front arm serves as a pivot point and is placed in the “water” (in the place of the cone). From now on, your gaze is directed towards the top cone. This combination results in another upper body rotation and therefore a tight turn. The three key words also apply to the backside bottom turn: “Compress” (bend your knees), “Reach” (reach into the water with your front arm leaning backwards, it helps to open the inside of your hand upwards) and “Hold” (you have to hold this position for a moment in order to ride the wave back up at as steep an angle as possible). If you shorten the “hold” position here, you will again only be able to ride onto the shoulder of the wave at a relatively flat angle (similar to the speed generation).


- RIDE UP: In order to ride the wave back up at speed from the bottom turn, we push ourselves upwards powerfully from the legs. We reinforce the upper body rotation initiated earlier in the bottom turn by continuing the rotation with both arms on the way up. This sequence of movements causes our upper body to turn in the opposite direction to the top turn.


- THE TOP TURN: As mentioned in the previous section, upper body rotation also plays an important role in this maneuver. You come into the top turn from the previous step with an opposite upper body rotation. This gives you much more rotation and therefore energy to initiate a top turn (here a right turn, for Goofy a left turn). Look back into the wave trough, let your front and back arm dictate the rotation and bring your body’s center of gravity further down again.


In conclusion, we can say that the movement sequence for the bottom turn is very similar to the top turn. So if you learn the bottom turn, you will have practiced the top turn on the opposite side at the same time. The biggest difference to surfing is the weight distribution (front and back foot). In surf skating, you don’t have to put any weight on the fins (and therefore the tail), which is why in most cases we have a central and even load on the front and back foot.
CUTBACK ON A FRONTSIDE SHAFT
If the previous maneuvers worked well, you can concentrate on the slightly more complex cutback. This is where many elements from the speed generation, the bottom turn and the top turn come together. The cutback is a very helpful maneuver for riding back into the steep part/pocket in a rather weak section of the wave. This exercise can be practiced both in the flat and later in a ramp and can be divided into three different areas.
- LIGHT BOTTOM TURN FOR A HIGH LINE (similar to the speed generation)


- 180° CURVE BACK TO CURL/POCKET: Recall the most important points from the previous lesson. The gaze leads the movement of the upper body/arms, the legs follow at the end. On the way “down” the wave, shift your body’s center of gravity centrally downwards, your arms form a “T”.
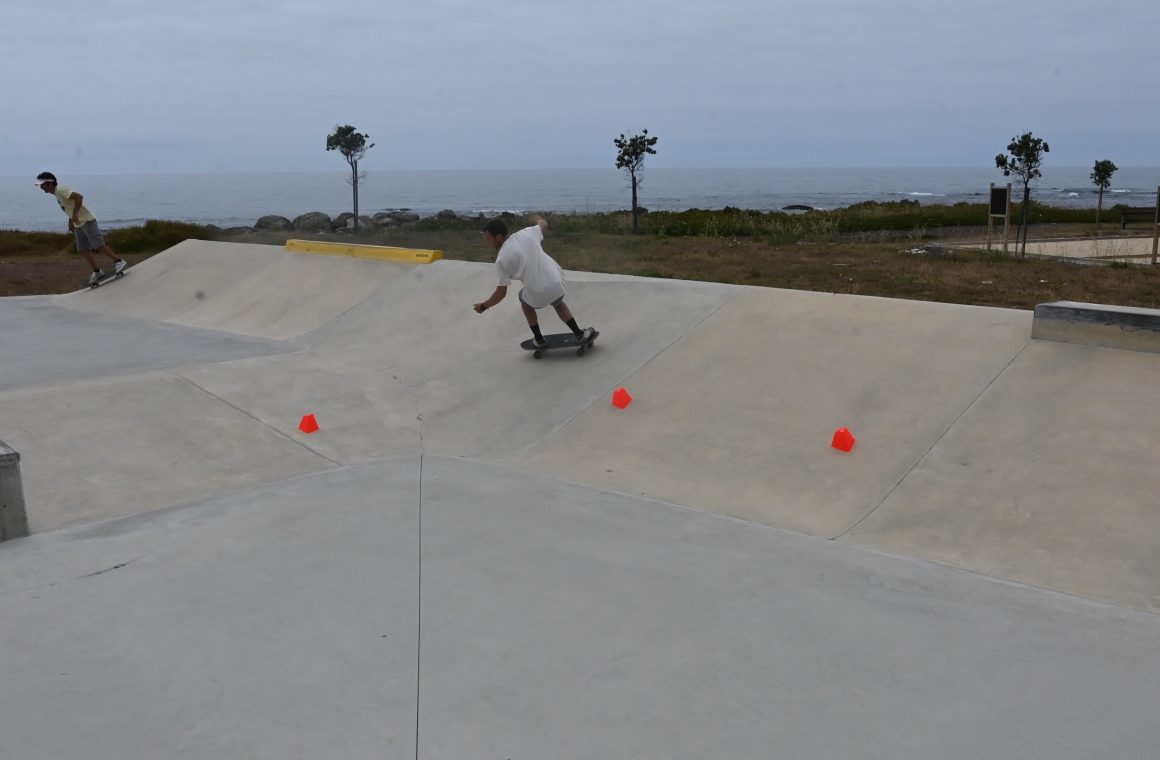


- TOP TURN
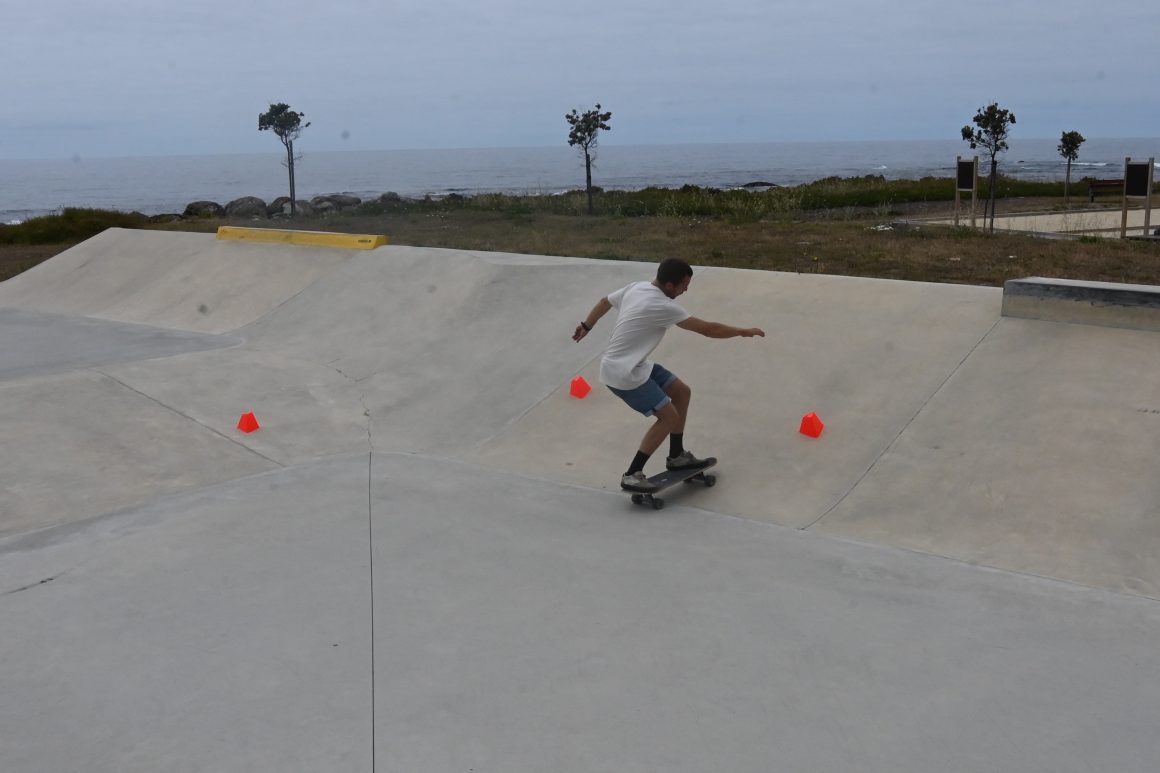


CUTBACK ON A BACKSIDE WAVE
- LIGHT BOTTOM TURN FOR A HIGH LINE (similar to the speed generation)


- 180° CURVE BACK TO CURL/POCKET: You recall the most important points from the previous lesson. The gaze leads the movement of the upper body/arms, the legs follow at the end. On the way “down” the wave, shift your center of gravity centrally downwards. Your back arm is again the pivot point.


- TOP TURN: Once you have internalized this sequence of movements, it is by no means the end. In the top turn in particular, you can ride many different variations (whether after a bottom turn or a cutback) and later, for example, deliberately let the rear axle break out (sliding). However, before you get to this point, the basics and timing of the basic movements are important. Unfortunately, as with all sports, this takes some time, so don’t lose patience! Find a surfskate partner or group and motivate each other! Feedback from outside can also be very helpful here.


You have reached the end of this article, we hope you had fun reading and trying it out. Next time you’re with us in Portugal you’ll have the chance to get back on a surfskate, ask us any questions you have and skate with us in the beautiful park in Ancora. We are looking forward to the upcoming sessions!
SURFSKATE GLOSSARY
- BOWL: Mostly round, recessed and steep element in the skate park
- CURL: Breaking part of the wave/white water
- FAKIE: Driving in reverse
- FLAT: Flat area in the skate park or in a parking lot
- GOOFY: Stand on the board, right foot in front
- POCKET: Steepest part of the wave, just before it breaks
- PUSHEN: Build up speed/bump up speed
- REGULAR: Standing on the board, left foot in front
- RAMP: Angled elements in the skate park
- TAIL: Rear, angled part of the skateboard

